Tuesday, January 30, 2018

An Inky Tag and Valentines

And just like that the first month of a new year comes to a close! I hope the start to your year was a good one, and now we head into February! So for a few of my projects up on the Scrap Shotz Blog I made some Valentines! And got wonderfully inky and messy making a tag!


Love the Modascrap Wood Effect paper that is the first layer on this tag and that Tim Holtz Scroll Die..a must have!


Three Valentine cards made with the Hello Sweetheart Collection from Carta Bella. I am such a paper junkie!! I want it all and I want more! :) Don't judge!! LOL

And the last project is a cute little pendant using the Carta Bella Collection for the inside of the pendant and Glossy Accents to fill it in. One day I will have resin but the GA work great.


For all the details and more up close pictures head on over to Scrap Shotz Snap Shotz and have a look.

Thanks so much for visiting and I hope you all have a great week and make time to be creative!

Cathy
 

Friday, January 26, 2018

Strong & Free

My latest project is up on the Wild Whisper Blog today! The Strong & Free Collection is so truly Canadian and encompasses so many things Canadian! In the card pack there is even a double double coffee cup! (which I am kind of keeping for myself lol ) I have also used the Eileen Hull Trinket Box, Book and Frame die to create this home decor piece.


For all the details and some close up pics of the fussy cutting in the top frame and the perfect twist on the wire that holds everything together, head on over to Wild Whisper.

Have a great weekend!!

Cathy


Hello Sweetheart at Scrap Shotz

It's time for a new project over on the Scrap Shotz Snap Shotz blog. This month I get to play with the Hello Sweetheart collection from Carta Bella! It's a great versatile line, perfect for Valentines cards and layouts. For all the details head on over to the Scrap Shotz blog!


I used the awesome Trinket Box Die from Eileen Hull. So many ways to use this! I have another project coming soon using the die in a completely different way!

Thanks for stopping by and have a fabulous Friday!

Cathy 

Wednesday, January 17, 2018

Out & About with a Trinket Box

I am obviously excited to have the new Trinket Box die from the Eileen Hull Book Club Collection! But even more excited to pair it with one of my favorite Wild Whisper Designs collections...Out & About! And I am using my stash!! I love love love flowers and I'm using them!! What a concept right? Buying pretty flowers for creating AND actually using them! I am so bad for saving stuff because it's pretty! New year, new plans!
Here is my Out & About Trinket Travel Box for you! More detailed pics and instructions are over on the Wild Whisper Blog!


This is the box  all closed. It stays closed with the camera charm I found in my stash with a piece of velcro on it.


The little notebook that fits right inside, and uses the Out & About Collection card pack.

So a post of must haves....the Wild Whisper Out & About Collection and the Trinket Box Die from Eileen Hull!

Thanks for stopping by and don't forget to head on over to Wild Whisper to see the details.

Have a great week!

Monday, January 15, 2018

Trinket Box Die is in the House!

I was so excited to use some of my Christmas money to order the Trinket Box!! And I love the leaf arches from the thinlits set! One day I'll have all the Eileen Hull dies on my wish list :)

And here is my first trinket box!! A Fairy's Den...


Here are a few step outs I did while I was making this little gem.

After I cut out my pieces I inked the covers and spine with Distress Oxides, and painted the tray piece with Finnabair's Sparks in Iris Potion. I also painted the inside black using my Dylusions.


I love shimmer!! And metallic!


While I was letting all of this dry, I used my Twist and Style tool to twist up my wire that would hold my fairy in place. I then painted my fairy in shimmery paints and wax finishes.

Look how perfect that twist is! Now to practice wire words!


A little resin fairy I had in my stash by Prima.
Ohh Hammered Metal Embossing Powder from Emerald Creek Craft Supplies...you make my heart skip a beat! These wooden spools were again bits I found in my stash!

Seriously look at all that melty goodness!

Inside behind the fairy is a little nest of pink mesh (that i saved from a bouquet of flowers)


I added a strip from the Graphic 45 Fairy Dust collection around the tray part. 


Then I added the leaf arches from the thinlits set and added flowers from my stash (which is actually getting low since I want flowers on everything lol )


Again...the finished Fairy's Den, with a little hare charm from Emerald Creek guarding the opening.


Thanks for stopping by and checking things out!! Come back soon as I've got a project for Wild Whisper Designs coming this week too!

Have a great week everyone!

Cathy 

Playing Along With:

Friday, January 12, 2018

Holidays Are Over, but....

I still have holiday projects to share!! I had to wait until the recipients opened their gifts and now have the time to do a post and share with you! This wreath was one of my favorites this year! You can't go wrong with the Tattered Poinsettia die!

The wreath is made of wood and I got it at Michaels last year. I do plan ahead sometimes! :)

The finished project!
I prepped all my bits and pieces first! I cut out 5 tattered poinsettias, then 5 large ones again for the leaves. Then I ran them through with the matching embossing folder (which I didn't even realize I had BUT am so glad I do).

The poinsettias I edged with platinum distress glitter and did platinum stickles in the centers. Before I did the glitter I used my new tarnished brass Distress crayon, scribbled on my craft mat, spritzed with water then used my finger to run it over the raised parts on the poinsettia. The leaves were done with evergreen bough distress ink and then I used a Finnabair wax on the raised parts.
I covered the whole wreath in ripped up pieces of TH Christmas stash from a couple years ago (yup I am a paper hoarder lol) and once that part was dry I sponged over it with Festive Berries, Gathered Twigs, Vintage Photo Distress paints.

For this part I used my absolute favorite TH stencil, Ranger Texture Paste and a touch of red acrylic paint with a pearl finish. 

This is one of my favorite parts!! I had this little resin window in my stash and this pic of Santa is cut out from the Th Christmas pad I had. Just like looking out the window on Christmas Eve and seeing Santa!
A little wooden word I had in my stash and stained with Tarnished Brass Distress Spray and the adorable little tree charm from Emerald Creek Craft Supplies.
 
One of my fave charms from Emerald Creek Craft Supplies.

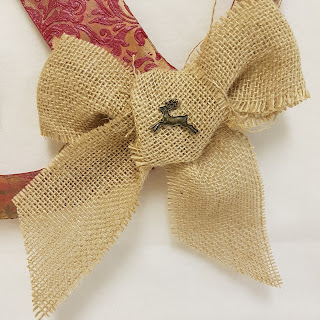
The vintage deer and Christmas trees are too cute and I had to add them too.
 And of course the gorgeous poinsettias! Just love this die!


And one more time because I just love it, the finished project!!


Thanks for stopping by and hope you are all having a wonderful week!! More Christmas posts to come LOL I still want to share the ornaments I made  this year and some of my favorite cards.

Cathy

Wednesday, January 10, 2018

A New Calendar with Wild Whisper

We are well on our way into the new year!! Hope you all had a wonderful holiday season and a great start to the new year!

I am up on the Wild Whisper blog today with a new project. It's a very simple project but something I needed to have in my craft room.

I created a 12 month calendar. I downloaded the calendar pages from Printable Calendars and chose the template with the room for a picture on the top. But I chose some of my favorite Wild Whisper cards from the collections released over the year.

I have a horrible habit of jotting down notes on scraps and then losing them in piles LOL So I thought with a calendar with some of my favorite quotes and positive words on it, hanging right behind me, I may have a better chance of staying organized! Fingers crossed!!

All 12 of the pages are up on the Wild Whisper blog! Pretty and practical!


It's also so customizable to suit how you want things to work. I chose bull dog clips so it hung flat, but you could use a snap ring, staples, one clip....so many choices. And the sentiments you use are any that bring you a smile, some positive inspiration or which ever ones you just want to see.

Thanks for stopping by and have a great week!

Cathy